아래의 내용은 https://chrieke.medium.com/howto-install-python-for-geospatial-applications-1dbc82433c05 의 내용을 참고한 내용을 참고하여 gdal2tiles.py를 사용하기 위해 GDAL을 설치하는 내용임.
01. anaconda 가상환경 생성
conda create -n [name]
02. 가상환경 활성화
conda activate [name]
03. GDAL 설치
conda install -c conda-forge gdal
04. GDAL 설치 확인
아래의 명령어로 설치된 gdal의 버전을 확인
gdalinfo --versionpython을 실행한 후, 아래의 명령어를 실행시켰을 때, 에러가 발생하지 않는 다면 GDAL이 제대로 설치된 것임.
python
from osgeo import gdal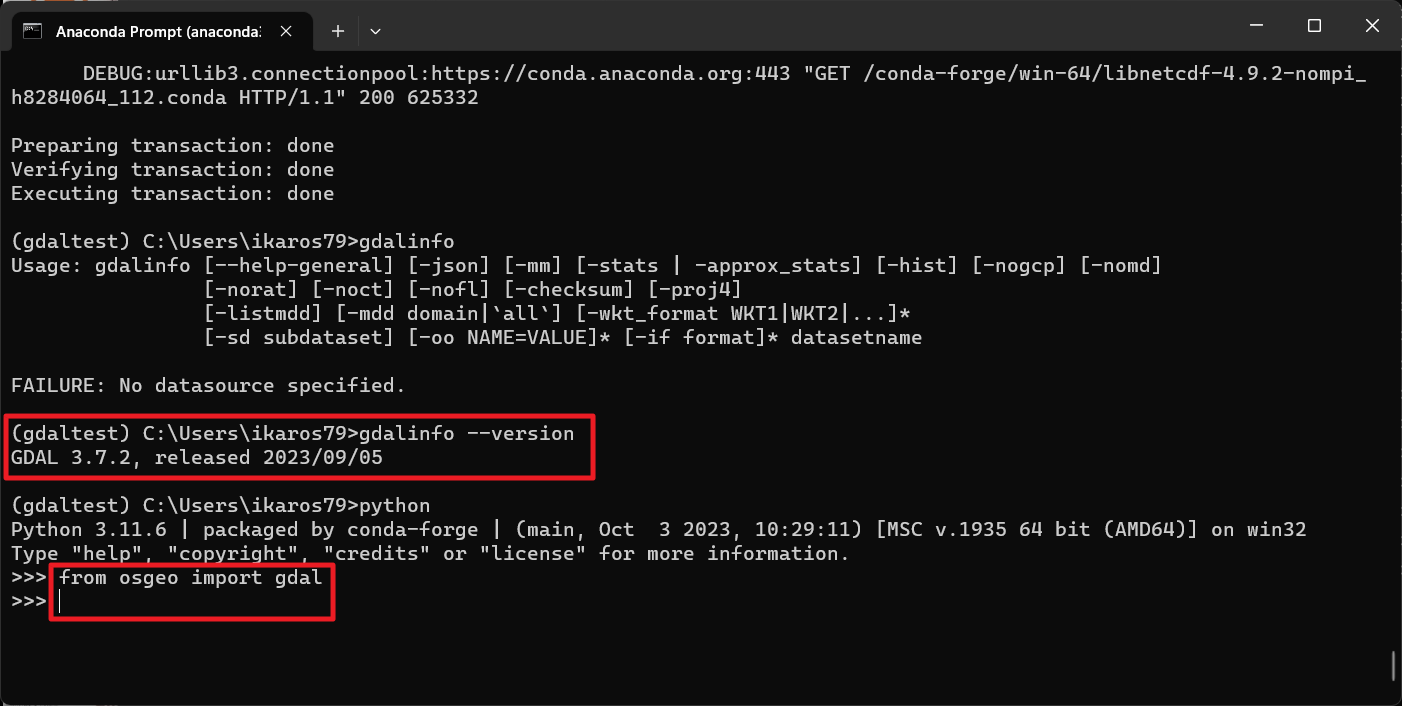
05. 윈도우 키를 누른 후, environments variable를 입력한 후, System Properties에서 Environment Variables 버튼을 클릭한다.

06. Anaconda에서 생성한 가상환경 이름으로 되어 있는 Variable과 Value를 확인한다.
없으면, New버튼을 클릭한 후, GDAL_DATA, C:\Users\[유저명]\anaconda3\envs\[가상환경명]\Library\share\gdal을 생성한다.

07. rasterio를 설치한다.
conda install rasterio
08. 나머지 패키지를 설치한다.
conda install numpy pandas geopandas scikit-learn jupyterlab matplotlib seaborn xarray rasterstats tqdm pytest sqlalchemy scikit-image scipy pysal beautifulsoup4 boto3 cython statsmodels future graphviz pylint mlxtend line_profiler nodejs sphinx nbsphinx
09. GDAL과 마찬가지로 Environment Variables 메뉴에서 PROJ_LIB와 C:\Users\[유저명]\anaconda3\envs\[가상환경명]\Library\include\boost\geometry\srs\projections\proj 변수를 생성한다.

10. conda로 설치가 되지 않는 나머지 패키지는 pip로 설치한다.
pip install sentinelsat mercantile
'Mapbox' 카테고리의 다른 글
| GDAL-02_gdal2tiles python library 설치 및 작동 (1) | 2023.10.05 |
|---|---|
| Mapbox Studio: 지도에 마커 표시하기-2: 커스텀 마커로 표시하기 (0) | 2023.04.30 |
| Mapbox Studio: 지도에 마커 표시하기-1: 위치 데이터 불러오기 (0) | 2023.04.30 |
| Mapbox Studio: 지도에 라벨을 한글(주)과 영어(부)로 표시하기 (0) | 2023.04.29 |


댓글